
Now that OpenSees is just another Python module, you can do some pretty cool things in the cloud (and on the ground). One of those cool cloud things is running an OpenSees analysis in a container on Amazon Web Services (AWS) or Microsoft Azure.
With either service, you can access inexpensive yet reliable high performance computing resources. This is useful for running parametric analyses or Monte Carlo simulations of large finite element models. Rather than get into those details, this post will focus on deploying a simple, deterministic analysis to the cloud.
This post covers three major steps to running an OpenSees analysis in a container:
- Create a local docker image of the analysis
- Create a virtual machine
- Deploy and run the docker image
In developing this post, I drew heavily upon this tutorial which used AWS for its implementation. So that I would learn something new, I used Azure for this post. I found the process to be similar between AWS and Azure with some minor differences in creating a virtual machine.
Throughout this post, I assume your local machine runs Linux (I used Ubuntu 18.04) and that you have sudo access on your machine. You will also need docker installed locally.
$ sudo apt install docker.ioCreate a local docker image of the analysis
You will create the three files (spring.py, requirements.txt, and Dockerfile) described below in a local directory of your choice.
Save the following commands in spring.py. This is the simplest OpenSees analysis you can possibly do. After you finish this post, you can containerize more complex models.
import openseespy.opensees as ops

ops.wipe()
ops.model('basic','-ndm',1,'-ndf',1)

ops.node(1,0); ops.fix(1,1)
ops.node(2,0)

k = 200.0
ops.uniaxialMaterial('Elastic',1,k)
ops.element('zeroLength',1,1,2,'-mat',1,'-dir',1)

ops.timeSeries('Constant',1)
ops.pattern('Plain',1,1)
P = 10.0
ops.load(2,P)

ops.analysis('Static')
ops.analyze(1)

print('Expected answer:',P/k)
print('Computed answer:',ops.nodeDisp(2,1))
The spring analysis only requires OpenSeesPy, so requirements.txt is only one line, but you can add other packages required by your script(s), e.g. numpy or pandas.
openseespy==3.2.2.4Finally, your Dockerfile will generate the docker image for the simple spring analysis. The base image is python:3.7-slim, one of the more lightweight options available. Note that you need to include libelf-dev in the docker image because it’s required by OpenSeesPy but is not part of the openseespy package (at least not in version 3.2.2.4).
FROM python:3.7-slim

COPY spring.py /
COPY requirements.txt /tmp
RUN pip3 install -r /tmp/requirements.txt
RUN apt-get update -y
RUN apt-get -y install libelf-dev

WORKDIR /
CMD ["python3", "spring.py"]
Now you can build the docker image and name it whatever you want. Here I used openseespy-spring.
$ sudo docker build . -t openseespy-springTo make sure everything is in order, run the Docker image locally.
$ sudo docker run -it openseespy-springYou should see the standard output messages from OpenSees about the default analysis options, then the print statements for the expected and computed spring deformation.

Now save the docker image then compress it.
$ sudo docker image save openseespy-spring:latest -o openseespy-spring.tar
$ gzip openseespy-spring.tar
You can now upload the openseespy-spring.tar.gz file to Azure (or AWS), then run your docker image in the cloud. I’ll cover that later in the post, but first you need to create a virtual machine (VM).
Create a virtual machine
Log in to the Azure portal or create an account. Note that you get a $200 credit valid for 30 days with your new account.
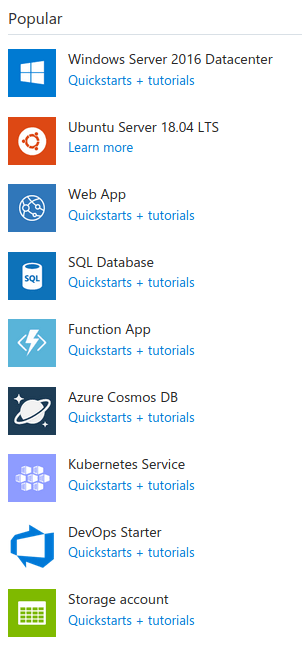
First, click the big plus sign to “Create a resource”.

Then create an “Ubuntu Server 18.04 LTS” image.
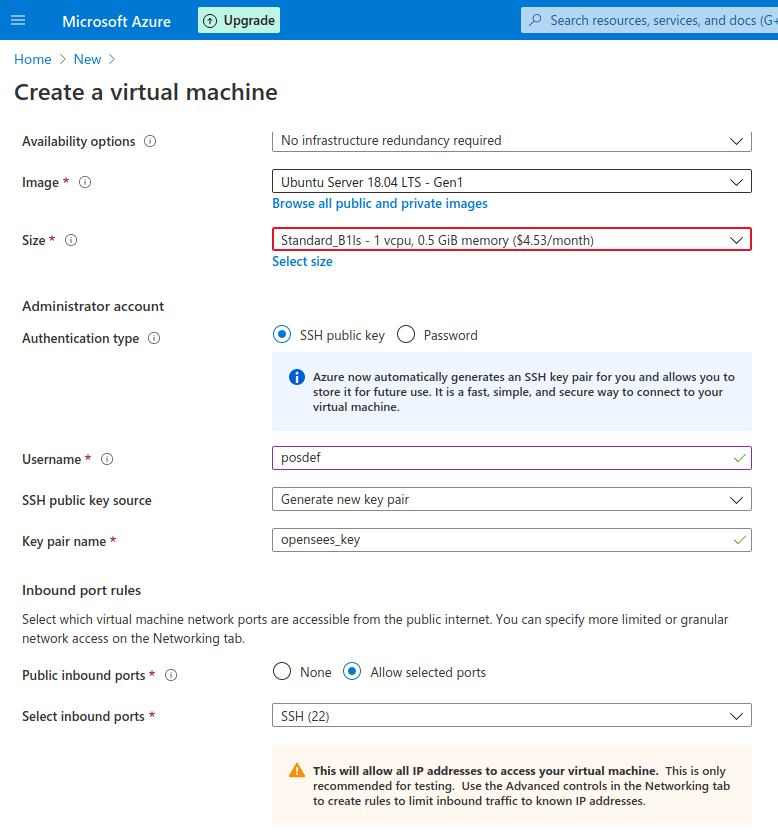
Under Project details, set the Virtual machine name to whatever you want (I picked opensees) and select your region. If you’re not using an existing Resource group, just go with the default name generated from your VM name (in this case opensees_group). Select “Standard B1ls” as the instance size. With 1 virtual CPU and 0.5 GB memory, this instance provides more than enough resources for this simple spring analysis, but you should consider a larger image for larger OpenSees analyses.

For the Administrator account (on the same page, below Project details), select “SSH public key” as the Authentication type. You can also select a username for the Administrator Account (I picked posdef). If you don’t already have a public key on Azure or you want to use a new one, select “Generate new key pair” as the SSH public key source. Name the key whatever you want, or take the default name. You can leave the Inbound port rules as the defaults.
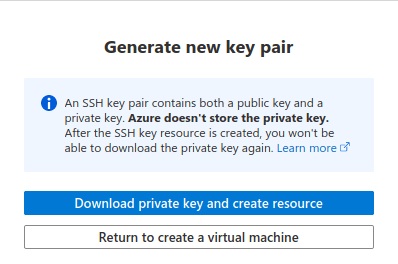
Click Next to proceed to Disks, Networking, Management, Advanced, and then Tags, accepting the default options all along the way. Click “Create” on the Review + create page. You will then be asked to generate a new key pair. Select “Download private key and create resource”.
Download the key pair to a safe place. Be sure to change the permissions on the key pair file so that only you have read access. If you don’t change the permissions, you won’t be able to connect to your VM.
$ chmod 400 opensees_key.pemAfter your deployment is complete (this will take a few seconds), click “Go to resource”.
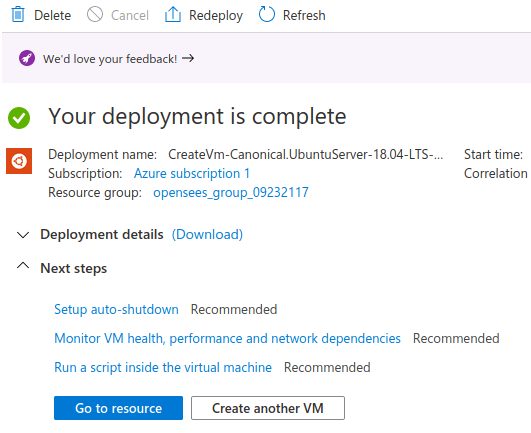
You will then see a page with information about your VM. Note the Public IP address (here 40.83.167.69, but yours will be different).

From your local machine, you should now be able to connect to your VM using the admin username you selected and the Public IP address assigned by Azure.
$ ssh -i opensees_key.pem posdef@40.83.167.69Note that your username and IP address will be different from what’s shown above.
Install Docker on your VM. You should have sudo access automatically because you’re the admin.
posdef@opensees:~$ sudo apt-get update
posdef@opensees:~$ sudo apt install docker.io
posdef@opensees:~$ exit
Congratulations, you are now ready to run a docker container on your VM.
Deploy and run the docker image
Upload the compressed docker image that you created in the first part of this post. So that it doesn’t eat away at your storage quota, store the file in the /tmp directory on your VM. Note that the upload can take a minute or two (the .tar.gz file I created was over 120 MB). Then log in to your VM.
$ scp -i opensees_key.pem openseespy-spring.tar.gz posdef@40.83.167.69:/tmp
$ ssh -i opensees_key.pem posdef@40.83.167.69
Note that your username and IP address will be different from what’s shown above.
On your VM, unzip the compressed docker image. Then load the docker image (may take a minute or two) and run it.
posdef@opensees:~$ gunzip /tmp/openseespy-spring.tar.gz
posdef@opensees:~$ sudo docker image load -i /tmp/openseespy-spring.tar
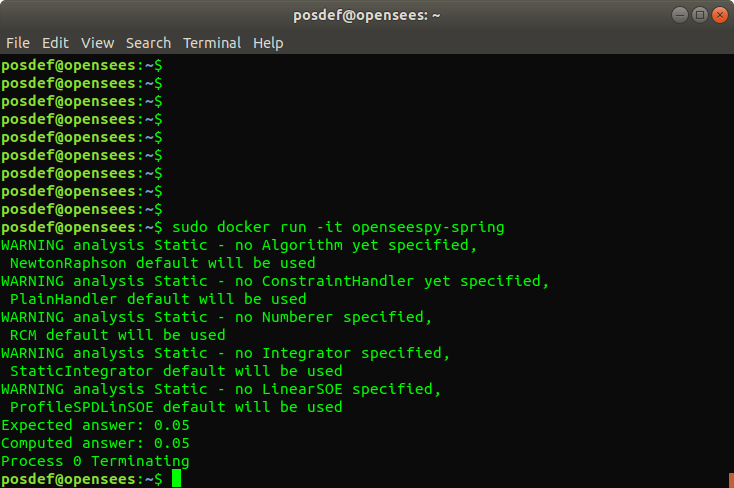
posdef@opensees:~$ sudo docker run -it openseespy-springYou should see the same OpenSees output as when you ran the docker image locally in the first part of this post.
Success! Now you’re ready to analyze more complex OpenSees models in a container. This was a minimum working example. There’s a lot more to using containers and virtual machines that was not covered here.
Be sure to stop or delete your VM if you don’t want to incur charges after your 30-day trial ends.

Thanks for sharing!
LikeLiked by 1 person
Thanks for sharing.
I often use google colab, replace.it or designsafe-ci.org
They are really powerful
LikeLike
Repl.it*
LikeLike
Is there a way to run a self compiled opensees.exe on aws?
LikeLike
You can do this on EC2 with the OpenSees Virtual Machine: https://aws.amazon.com/marketplace/pp/prodview-pfdzfieycxidk
LikeLike